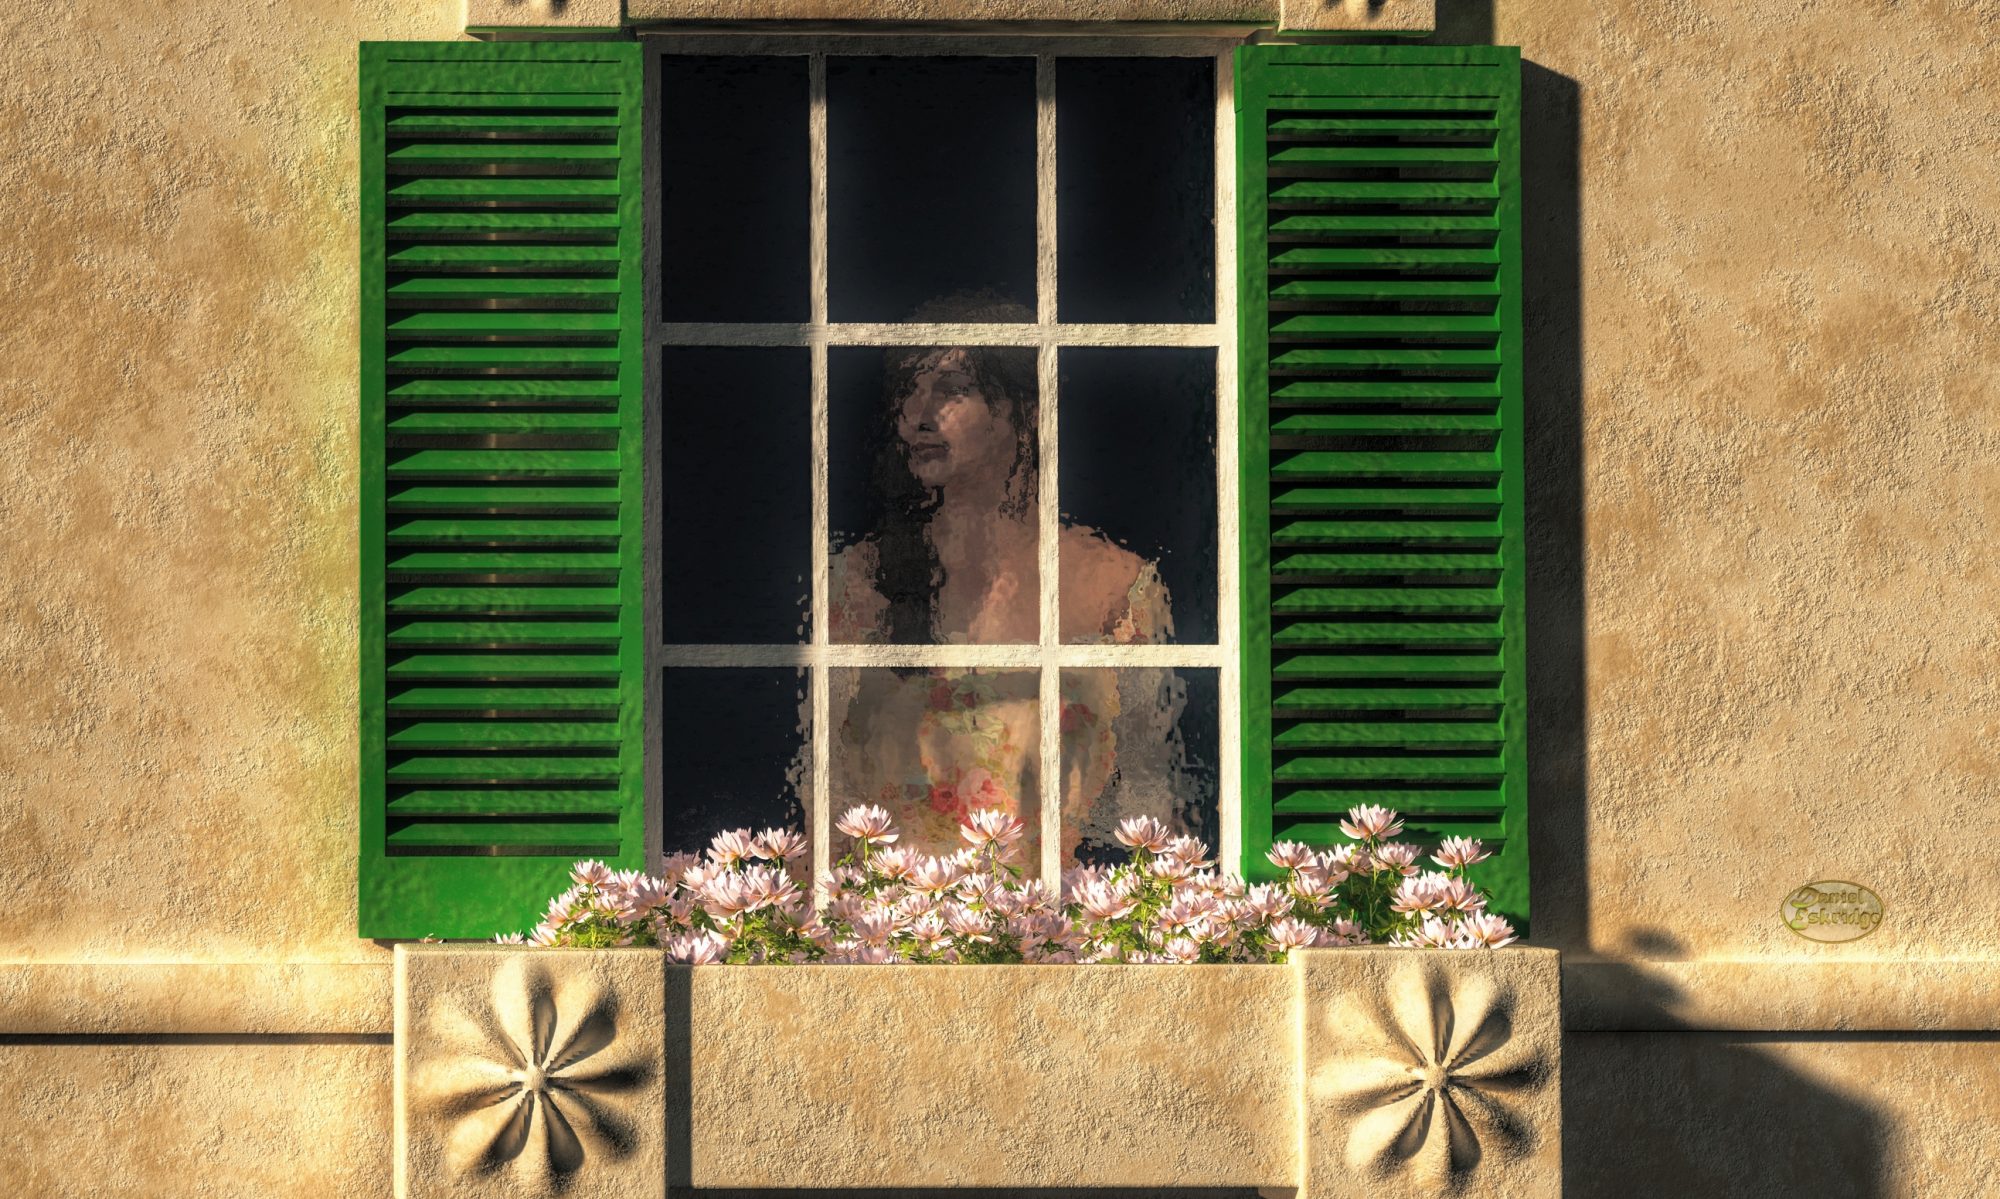
A phone case I offer though my FineArtAmerica account.While I prefer sales of prints to be how I make money with my art online, there are alternative ways to so. One I’ve mentioned before is to use Zazzle to sell your art as designs on products such as coffee mugs and phone cases. However, not long ago, the service I use to sell prints, FineArtAmerica.com recently added phone cases to their offering.
They are only available through FAA’s sister site Pixels.com. So if you send people to your art on FineArtAmerica, visitors will only see the Fine art and home decor offerings, not the phone cases. You don’t need to do anything extra to have your art appear on Pixels.com, it will do so automatically when you add art to FAA, but you DO need to specify mark-up’s on the phone case to have them available on Pixels. Also, if you pay the $30 a year registration, phone cases will appear on your artist web page.
Now you could just use Zazzle to offer a phone case featuring your art, but I prefer Pixels for three reasons:
The User Interface on Pixels.com is way easier to deal with. On Zazzle, customers have to switch to “customize” mode to move and resize the image on the phone case. Pixels, on the other hand allows user to quickly and smoothly drag the image around, rotate with a drop down selection, and resize with a responsive slider.
Adding products to FAA/Pixels is usually bug free where as Zazzle has horrible problems with creating products, particularly if you try to use the Quick Create tool.
FAA’s fixed amount markup allows me to make a larger commission with a phone that costs the customer less. For instance, if I set a mark-up of 1$0, the case will sell for $40 on Pixels. To get $10 on Zazzle, I have to set a commission rate of 21.5% which sets the cost of the case at $48.95…that’s a 22% increase to the customer. Plus, Zazzle charges $2 more in shipping.
So, if you are looking for an alternative to just selling prints, I suggest checking out FAA’s phone case offering for makeing some money off of your art.
Regards,
Daniel
P.S. If you liked this article, please consider signing up for my newsletter. I send it out every Wednesday and it includes links to my latest artworks, articles, and videos, as well as discounts, deals, and freebies!
I’ve been posting my art to my Facebook Fan Page for a few years now. Occasionally, if I thought a work was particularly good, I would use the Facebook Advertisement system to boost the post. Sometimes those boosted posts would produce wonderful results, but other times, I was pretty much just wasting money.
The problem was that I didn’t have a clear idea of which artworks found a large audience and which didn’t. Sure, I might have liked a piece, but that didn’t mean anyone else did. The result was that I would sometimes boost posts (spend money), but get no clicks, likes, comments…nothing, and, most especially, no sales. I needed a way to know which of my artworks garnered a larger response.
It turns out, the solution was right there at the top of the screen. When you log in to your Facebook Fan Page, you’ll see a menu across the top. One of the selections is labeled “Insights”. If you go there, you get access to a huge amount of reports regarding the performance of your Fan Page and its posts.
It would take a book for me to go through all the benefits of this feature. However, today, I want to focus on just how I use Insights to figure out the best posts to boost. It’s really quite easy:
Once logged into my Fan Page, I click on “Insights” at the top of the page
In the sub menu that appears on the next line, I click “Posts”, and a list of posts appears at the bottom under the graphs
Just above the list, on the far right, I click on the down arrow next to “Post Clicks | Likes, Comments, & Shares” and choose “Engagement Rate”
Now there is something interesting to look at. The second to last column shows a percentage for each post in the list. That number represents the amount of people who did something (liked, clicked on, commented on) with that post verses the amount who basically ignored it. All I do at that point is go down the list looking for the posts with a higher percentage to know which are the best candidates for a boost.
Here is my Facebook Fan Page Insights section. In green, I’ve labeled the steps to get the Engagement Rate to show. In blue I’ve circled the score for my most recent post 11%.
The results are that my boosted posts now tend to always get a lot of engagements. If not always sales, I at least pick up more followers to my fan page as well as subscribers to my mailing list. I still get the occasional dud, but they are MUCH rarer.
Regards,
Daniel
P.S. If you liked this article, please consider signing up for my newsletter. I send it out every Wednesday and it includes links to my latest artworks, articles, and videos, as well as discounts, deals, and freebies!
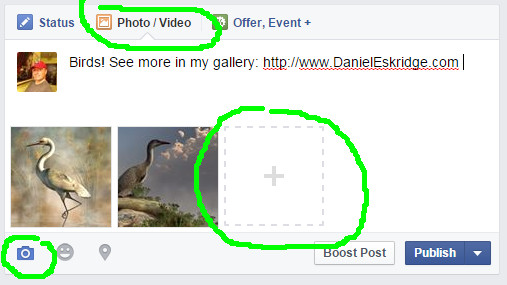
Here is a recent multi-image post that I made on my Facebook fan page
I find that being an artist is about more than just making art, it’s also about getting people to see your art. To that end, I’ve found my Facebook fan page to be one of my most useful resources for publicizing my images. Occasionally, I use the basic image post to show off my latest works, which is nice in that the image appears forever after in my fan pages’s photo album. More often however, I use link shares, which are superior at bringing visitors to my gallery site.
Sometimes, however, I want to do something that draws my fan’s eyes a bit more. After all, Facebook users see image and link posts flooding their streams all the time. For that, I’ve found that a third method of posting images exists: the multi-image post.
Multi-Image Facebook Posts Defined
The multi image Facebook post is simply a post containing more than one image. Facebook is smart enough to size the images based on the number of them in the post to make them fit. If you post two, they appear one over the other. If you post three or four, you get one image on top larger than the others. If you post more than four images, only the first four will appear, but the fourth will be darkened and have “+#” appearing over it indicating how many more images are in the set.
The post can include a text section that appears above the pictures. Also, all of the images will appear in your fan page’s photo album after you’ve posted the status update.
How to Do a Multi-Image Facebook Post
There are several ways to do a multi-image post:
If you’ve already started a basic image upload, you can just click on the square with a plus sign in it to add more photos. If you want to control the order in which your images appear in the post, I suggest this method.
You can select the photo/video tab from the status update section, click “Upload Photos/Video”, then ctrl+click on more than one image from your hard drive.
If you’ve already started typing a status update, you can click on the camera icon underneath, then ctrl+click on more than one image from your hard drive.
You also can include text with links as part of the post. Once you’ve actually posted the set, you have one more step to take: you need to click on each image and give it a description (and preferably a link back to that image’s page on your FineArtAmerica gallery or other website).
Effectiveness of the Multi-Image Facebook Post
So now the big question: how is the multi-image post useful? Well…I’ve found that it does seem get a bit more attention than the other forms of image posts.
To start with, it simply shows up bigger in peoples stream’s. Also, a cluster of images also seems to draw attention more than a single one.
However, though I get more comments and “likes” on these kinds of posts, I get virtually no one clicking through to my print gallery. As a result, I only occasionally use multi-image posts to spice things up. That’s not to say you may get different results. Either way, it’s a good tool to know about.
Regards,
Daniel
P.S. If you liked this article, please consider signing up for my newsletter. I send it out every Wednesday and it includes links to my latest artworks, articles, and videos, as well as discounts, deals, and freebies!
This work has hundreds of likes and comments on FineArtAmerica. It sells WAY better than very similar works of mine will few comments and likes. It seems that people just take it more seriously when they see all those comments. That is Social Proof.I’ve mentioned before that there is no such thing as good or bad art. When it comes to an individual piece of art, there will be people who do like it and those who don’t. What you should be concerned about then is getting people to like your art. One of the best ways to get people to like your art is to show them that other people like it.
I know it sounds a bit like circular logic, but it tends to be true. People take their cues from others as to what is popular. If they see a lot of people paying attention to something, they too will want to see what all the fuss is about. This is a concept known as social proof.
When it comes to selling art online, there are a few ways that I’ve found to apply the concept of social proof.
Likes, Favorites, +1’s
One of the ubiquitous features of social network sites is the ability to the somehow indicate that you like someone’s post. On Facebook, its “liking” while on Twitter it’s called “favoriting”. Don’t forget: it’s not just those sites that are social networks, MANY sites are built on the social network architecture and will have a similar feature. For instance, FineArtAmerica.com has both a favorite and a like feature.
So how does this apply to social proof? Well, let’s say you’ve posted one of your works to a social media site. If visitors see that it has a lot of likes, they are likely to give it a closer look. In fact, Facebook, actually relies on the number of likes a post has received to determine whether or not to place your post in more of your friends/followers streams. They’ve actually institutionalized social proof in their system!
So how do you get likes on your posts? If you have a good following, you will naturally just get a few from your biggest fans, but if you want more, you’re going to have to be…well…social on social networks. Find other artists and like/comment on their works that you find appealing. Some of those artists will reciprocate.
Also, on some sites, you might want to send a personalized thank you message to anyone who likes your post. It will increase the chance that they will like more of your work.
Comments
Sometimes I see artists disable the comments on their posts. I think they’re crazy. This is a great opportunity to gain social proof.
Think of it this way: say you are looking to buy a book on Amazon and you’ve narrowed it down to two books. Otherwise equal, one has dozens of reviews, the other has none. Which one are you going to tend to pick?
You get comments on your posts the same way you get likes. Comment on other artists works that you like, thank people who comment on your work, and build a following.
If visitors see a lot of good comments about a work, they are going to be more likely to buy. That being said, delete all negative comments. Negative comments might put doubts in a potential buyer’s mind. And don’t leave negative comments on other artists posts either. It’s bad form all around.
Sales
One last way to have social proof of your art is to let everyone know when you make a sale. Sure, it may seem a bit like bragging, but you really should be proud of a sale anyway. After all, you just beat out the competition for someone’s wall space, and, when it comes to art, there is some pretty stiff competition.
So whenever you make a sale, post it on Facebook, tweet it out, mention it on Google+…let everyone know. A few people are inevitably going to come see what was so special about your art that someone actually paid for it.
Some sites may make this easier for you. For instance, FineArtAmerica.com has a nice feature that automatically generates an announcement page for any of your sales with buttons right on it to send it out on social sites.
One more thing you can do with this is also take the opportunity to publicly thank the buyer. Perhaps this will turn them into a returning customer.
So, after you’ve published a work online, put some work in to get it some social proof. When people see a lot of activity around your works, they’re much more likely to give it a closer look.
Regards,
Daniel
P.S. If you liked this article, please consider signing up for my newsletter. I send it out every Wednesday and it includes links to my latest artworks, articles, and videos, as well as discounts, deals, and freebies!
One of the most important things you can do to sell your art online is to build a mailing list. This is a list of email address to which you send newsletters, articles, announcements, and whatever else regarding your art business. For instance, I send out a weekly newsletter in which I tell my subscribers about any new art, articles, and videos that I published that week, as well as about discounts and specials. I also offer a free computer desktop wallpaper each week as a gift.
Why A Mailing List Beats Social Media
Having a mailing list is important for two reasons:
It is a resource that you own. With your followers on social networks, you are at the mercy of site. For instance, this past year, Facebook changed the way it determines when to show your posts to your follows. The result has been that only 20% or so of your followers now see your posts to your Facebook fanpage (unless you pay to “boost” your post). With your own email list, you can’t be crippled by someone else that way.
Your subscribers have to somehow deal with the mail you send them. This is unlike social network posts where your followers can simply ignore your posts as they cycle off their stream. With an email, the recipient has to open it, delete it, mark it as spam, or leave it in their inbox forever.
Opting In: How People Get on Your Mailing List
People choose to get on your list by giving you their email address. This is called “Opting in”. Never send emails about your art business to people who have not opted in to your list. That’s called “spamming” and it is a huge NO-NO.
There are a couple of ways people can opt into your mailing list. One is for them to just tell you their email address. For instance, you might meet someone in public who expresses an interest in your art and, after some conversation, they write their email address on a piece of paper for you or give you a card. The other, though, is more useful online: you have some sort of form on a website where people can submit their email address and perhaps their name.
If you have a Fine Art America account, they do have an email campaign feature. The form for visitors to sign up on you list can be reached from a link just below your picture on your profile. FAA’s email campaign system is pretty bare bones though, and emails show as coming from “donotreply@fineartamerica.com”. So if you use your FAA profile to be your Opt-In form for your email list, then I recommend moving the emails you get there into a better email campaign manager.
If you don’t want to use the FAA form, you can always create one through an email campaign management site. You’ll have to have a blog or website that allows you to add forms to it though. However, this can really be a better way to handle things as the email campaign managers allow you to set up autoreponders that automatically send confirmation emails and introductory emails to anyone who signs up using the form.
Email Marketing Campaign Managers
Email campaign managers are websites where you sign up for an account. Once you’ve done that, you can manage your email list through it and generate and send emails to the people on your list. They also allow you to set up autoresponders which are scheduled emails that are automatically sent to people who sign up on your list.
The two big sites that I see used are:
MailChimp
MailChimp is nice in that you can use it for free until your email list grows to over 500 subscribers. The forms are a little basic, but still easy to make using a wizard on the site. Setting up autoresponders however, requires you to use one of their pay models.
AWeber
AWeber seems to be what all the pros use. It does not have a free tier, but does allow you to use it for $1 for the first month and $20 per month there after. It seems to have better form generation capability as well as a better system of setting up autoresponders. Also, I’ve heard from those that have used both AWeber and Mailchimp that AWeber mails are less likely to automatically wind up in spam boxes.
A lot of the bloggers that I follow who talk about online marketing insist that your email list is your most important resource. For artists, I would say it comes in third behind your art, then the text around your art (the title, keywords, and description). Still through it is VERY important. So, when you are coming up with your marketing plan don’t forget to include a mailing list.
Regards,
Daniel
P.S. If you liked this article, please consider signing up for my newsletter. I send it out every Wednesday and it includes links to my latest artworks, articles, and videos, as well as discounts, deals, and freebies!
Probably the best way to make money online with your art is to sell prints using Print-On-Demand (POD) sites. If you want to know more about How I use a POD site to sell art, jump over to my new website and checkout this page: How I Sell Art.
That said, the most important thing you can do to have a healthy gallery on a POD site is to upload high quality digital images of your artwork. So without further ado, here are a few things I’ve learned about uploading your art to sites like FAA:
Do Use Big Images
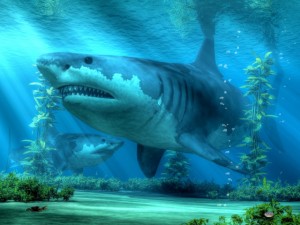
For my work “The Biggest Shark” I used the biggest image I’ve ever produced at over 50 megapixels.
The higher the resolution of your image, the larger the print that can be made from it. So if you upload a 600×800 pixel image, your customers will not have much choice in the sizes of the prints they can order. They’ll be stuck with some very small options. I generally upload only images that are 3000×4000 (that’s 12 megapixels) or higher, but you can probably go as low as an 8 megapixel image and still provide a wide range of print sizes for your buyers.
Don’t Upsize You Image
Though you should use big images, NEVER enlarge a small image using something like Photoshop or GIMP. Enlarging a digital image lowers it’s quality, creating pixelation that will be visible as “patches” in the print. If someone orders such a print, the POD service might refuse to complete the order. They don’t want to risk the loss associated with a return. Not only is the sale cancelled, but the customer is left frustrated and will likely not return.
Do Enhance Your Image
For, “A One Sided Conversation” I used Topaz Impression to enhance the image to look like an Impressionist painting.
If your image was not digital art to begin with, take the opportunity to enhance it. If you used a digital camera to digitize your work, you may HAVE to do this to compensate for less than perfect lighting conditions at the time you took the picture. You can use software tools to do things like:
Now, if you are trying to sell the original through your POD site along with prints, you probably don’t want to make the digital version diverge too much from the original. After all, you don’t want to misrepresent your original. Otherwise, you can enhance to your hearts content. In fact, you might even try using the same source image and applying different sets of enhancements to different copies to turn one work of art into many.
Don’t Overcompress
Many PODs have a file size limit, and, in order to come in under that limit, you will probably have to use some form of compression to on your image. The most common form of image compression is JPEG. When you use software to compress an image, such as GIMP or Photoshop, they will offer a list of compression algorithms. PNG is better, so use it if you can, but often, the files that it produces will still be too large, and in some cases, it’s irrelevant because the POD site converts all uploads to JPEG anyway. So, if you use JPEG (JPG), you will usually be given the option to set the quality of the compression as a percentage. Go for the highest percentage you can to avoid a banded look in parts of your image where there are large areas of similar color. If you compress too much, the image quality might fall below the threshold of what the POD will print.
Sometimes, I will actually reduce the size of an image rather than use a low JPEG quality level to get an image under the max file size for FAA. Unlike upsizing an image, downsizing does not lower the quality nearly as much.
Do Create A Low Resolution Version For Marketing
Once you have your digital image ready to upload to a POD site, create a small copy of it, something that is only a couple of megapixels. Use this smaller copy when you upload your image to anywhere other than your POD site. So if you are marketing your work on any social networks, such as Facebook and Twitter, or photo sharing sites, such as Flickr and Tumblr, use the low resolution image. First off, it will be quicker to upload, but also, it will deter any serious art thieves. With only a low resolution image, no one can take your image and reupload it as theirs to another POD site and compete against you with your own image. Also, make sure the POD site does not make your full resolution image publicly available.
________________________
These are some of the important tips I’ve picked up over the years using POD sites. I’ve always been surprised at how many artists I see on forums complaining that their sale was cancelled due to poor image quality. I know it would certainly ruin my day to see one of my sales reversed. So make sure it does not happen to you. Upload quality digital images to your POD account.
Thanks everybody!
Daniel
P.S. If you liked this article, please consider signing up for my newsletter. I send it out every Wednesday and it includes links to my latest artworks, articles, and videos, as well as discounts, deals, and freebies!
* Please be aware that my link to Topaz Impression is an affiliate link. Should you click through that link and order anything from Topaz withing the next 30 days, I get a small commission. This happens at no additional cost to you. And, THANK YOU in advance if you to do order.
“Dodo Afternoon” One of my best selling prints on FAA.
Generally people like to save the best for last, but I’m going to go with the best first. Building up the infrastructure to sell art online requires time. When you post artwork for sale, it can take months for search engines to pick up your entry. So I’m going to tell you about my favorite Print-On-Demand site first, because, the sooner your get started, the better.
As I’ve mentioned before, Print-On-Demand (abbreviated “POD”) sites are websites that display your artwork on the web, and, from which, people can purchase prints. A print of your art is not made until someone places and order. The POD site handles accepting the payment, making the print, shipping it and handling any returns. The website gets part of the profit from the sale and your get the rest.
There are dozens of POD sites on the web. So which is the POD site that I prefer, the site where I keep all of my art that I sell as prints? It’s FineArtAmerica.com (abbreviated by most people as FAA).
If you’d like to know more about how I used FineArtAmerica to sell my artwork, check out my article How I Sell art on my art site.
FineArtAmerica.com has recently been transitioning to the name Pixels.com, so visitors can go to either site and your works will appear on both (There is one subtle difference between the two: pixels offers phone cases featuring your art in addition to prints).
FineArtAmerica: Pros
There are quite a lot of features I like about FAA…too many to list in this article, so I’m only going to cover the top ones.
Fixed Mark-Ups
In my experience, the biggest benefit that FAA offers is mark-ups. On FAA you specify your commission for a print sale as a dollar amount…you set a mark-up for each print size. Conversely, almost every other POD site has you specify your commission as a percentage of the total sale, which makes it hard for you to know how much you will get for a sale and sometimes (depending on how they do their math) can make your works much more expensive than they would be on FAA for the same commission amount. In fact, the owner of FAA, has an article that includes this very subject.
Sized to Fit Prints
One of the things that drives me nuts about most POD sites, it that they only sell particular sizes of prints. These are usually the standard sizes such as 11″x14″, 16″x20″, 18″x24″, etc. The problem with this is that your artwork’s aspect ratio can’t fit all those sizes, and, in fact, may fit none of them at all. To deal with this, those sites force your work to be cropped to fit their offered sizes. Not so, with FAA. On FAA, the selections are based on the length of the longer side of your art. The shorter side is automatically adjusted to fit your whole image, meaning that no cropping is necessary.
Artist Website
For users who pay the annual fee ($30 U.S.), FAA automatically creates a website just for you. You can even have your own domain name (like DanielEskridge.com) redirected to this site. Your artist website requires no additional work on your part; though, if you want to, you can customize it to some degree. One of the great things about this site, is that visitors see only your work and none of the work of other artists on FAA. For instace, if visitors do a search on your artist website, only your works show up in the results.
Licensing
If you’re an illustrator like me, there is a licensing program that allows people interested in using your art for their commercial endeavors to purchase non-exclusive license agreements. FAA handles the contract, fee collection, and the delivery of the high resolution file. All you have to do is watch the fee get credited to your account! Note that they do add a 30% mark-up on top of your fee.
Other Great Features
Here’s a few other great features:
You can sell originals on FAA
FAA has a mechanism for you to manage an email marketing campaign
FAA allows you to generate discount codes and have limited promotions
FAA has social aspects such as user organized Contests and Groups
FineArtAmerica: Cons
FAA is not perfect. Here are a few cons that I can think of…
The Fee
A lot of POD sites are free to use. FAA does have a free option, however you are limited to 25 works for sale and you miss out on a lot of features, like the artist website. The fee could be worse though as it is only $30 (U.S.) a year.
Preferential Treatment
The internal search engine, collection galleries, and featured images all favor artists whose prints sell better. If you are new to FAA, this works against you a bit as the established artists have the advantage. However, keep in mind that the folks at FAA report that most sales come from buyers who found the art via a Google search, not from internal browsing and searching.
Upload size limit
Any image you upload to FAA must be under 25 megabytes. For a large high quality JPEG, that is easy to pass. I often finding myself having the lower the compression quality of my images to fall under that limit.
Print Rejection
For digital artists like myself, this isn’t much of a problem, but photographers and traditional artists may get hit with this. Whenever a print is ordered from FAA, someone checks the quality of the image and might reject if it falls below a certain standard. Generally, they look for things like blurriness, pixelation, visible edges – like the side of the canvas that the painting is on, etc, i.e. technical flaws. The problem is you don’t get this rejection until someone orders a print. That means that not only does the artist miss out on a commission, but the buyer might be driven away. In some cases, it is understandable, as the images really are of poor quality, but I’ve often seen artists complain of an image being rejected that was really not that bad or only appeared to have problems due to the artists particular style.
____________________
There is a lot to FAA. If you are looking for a good POD site, I strongly suggest you check it out.
If you intend to sell prints using POD services, or if you are creating digital art that will be printed for some reason or another, such as book cover illustrations, then this is something you will likely have to deal with. I get it from time to time, especially when doing illustration contracts. A person from the print shop or publisher will tell me that my image has too low of a DPI and that they can’t print it. This person does not know what they are talking about. Now it could be that that what they mean is that the image’s resolution is too low, but, for my images, which are usually in the 40 Megapixel range, such is not the case. Most of the time they are just ignorant of what DPI really means when it comes to a digital image file.
DPI
It’s the size that matters!The subject of DPI comes up quite a bit when you deal with digital art. DPI stands for “Dots Per Inch”. People who deal with printed media seem to think it is an important number. Indeed, when you actually print something, it can be somewhat important. An image printed at 300 dpi looks great to the human eye from just several centimeters away; at 50 dpi through, it would look pretty grainy close up. However, when it comes to digital art in its digital form, that is, as an image file on the computer and not printed out, it is almost completely irrelevant. In fact, it is actually less relevant even when printed than some might have you believe.
DPI has virtually no relevance for a digital file. It is just a number in the metadata (known as the EXIF data) of an image file that suggests to a printer how dense to print that image. That suggestion can easily be (and usually is) overridden when a print is made. For instance, if I have an image file where the EXIF data states 300 for the dpi and the image is 3000×3000 pixels, the bitmap data is exactly the same as a 100dpi version of the same image that is also 3000×3000 pixels. The only difference is that if you print them both without specifying a print size then the 300 dpi one will print a 10″ x 10″ print and the 100 dpi would give you a 30″x 30″ print. Now, if you took the 100 dpi and told the printer to give you a 10″x10″ print it would actually give you a 300dpi print thas is ten inches on each side, i.e. you’d be overriding the default dpi.
In other words, resolution is what matters. An image with a high resolution can print a larger, higher quality image than one that has a low resolution. When it comes to digital art, the number of megapixels is what is important, not dpi. That is one of the reasons I create all of my art at at least twelve megapixels and quite often as much as sixty. That size gives lots of printing options.
Not only is DPI irrelevant to digital files, is also overrated when it comes to printed material. It is true that the higher the dpi, the higher the quality of the print. Print shops often insist that 300 dpi is the gold standard and that all images be printed at that or a higher resolution. 300 dpi does indeed look great from even a few centimeters away, but how often do you really look so close at a piece of wall art that your nose is nearly touching it? Probably not often. Most people look at wall art from a few meters away. At that distance, a 300dpi and a 100dpi print of the same image at the same physical dimensions would look identical. If you don’t believe me, get a close up look at a billboard image one day. From arm’s distance, you’d see nothing but a bunch of colored dots. Billboards are printed at around thirty dpi.
PPI
Some people might tell you that DPI is not important for an image but that PPI is. They don’t know what they are talking about either. PPI stands for Pixels-Per-Inch. It applies to monitors not files. For a digital image file, this is meaningless. Where is does come into play is when an image is displayed monitor. A monitor with a high PPI will show images smaller but with higher quality, but, again, for the image itself, the resolution does not change. It’s the monitor that determines the PPI, not the image.
______________________
I hope that clears a few things up for some!
Daniel
P.S.
Don’t forget to check out this week’s sponsor, Dick Blick Art Materials (since I offer this site for free, I have to fund it somehow 😉 )
I’ve mentioned before that you can make money with your art online by selling it directly or as prints from POD sites. Sales like this can be difficult. First off, buyers only have so much wall space, once they fill it, their demand for art drops to almost nil. Furthermore, you have a lot of competition for that wall space. Not only must you compete with other artists out there today, but because of the nature of art, you have to compete with artists from the past as well. In any give year, prints of Monet’s paintings likely outsell those of any artist alive today. So, yes, you are competing with the grandmasters. Not only that, you are also competing with your prospective buyer’s family photos and even more mundane stuff, like mirrors.
Keep your chin up though, you may have a lot of competition in the wall art arena, but prints still sell. After all, I sell them, and if I can do it, you can too. In fact, if you want to see how well I do at selling via POD check out my article “How I Sell Art“.
However, this point of this article is something else: that there are other online ways to make money from art. So without further ado, here’s a few new ways you can earn art income:
Design
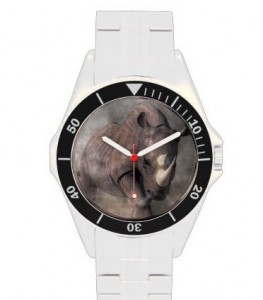
One of my best sellers on Zazzle is a watch with my work “Angry Rhino” on the face
Your art does not necessarily need to be just framed wall art. It can also become part of a more utlitarian object. In the art world, this is known as design. For instance, you can put you artwork on a coffee mug and sell that, or, perhaps, you can make a T-Shirt that features your art.
Making such items may sound like a lot of work, but, it does not have to be. Just as there are POD sites that will print and ship your art for you, sites such as Zazzle and Cafepress act as POD sites that will put your art on anything from coffee mugs to mobile phone cases. They handle the payment and do the shipping. You just collect the commission.
Personally, I use Zazzle as reports of product quality seem higher and I can set my own commission rate (Cafepress is locked at 10%).
Let People Rent Your Art
Art can be expensive, that can deter a lot of customers. What’s more peoples tastes change, and people recognize this in themselves. For many, buying a piece of art may seem like too much of a commitment for the cost. So, one site offers a novel solution: Turning Art, allows users to rent prints for a period of several months, with the option to buy at the end.
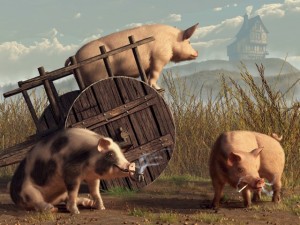
I’ve never sold a print of “Rough Crowd of the Farmyard” through my gallery, but through TurningArt it has been rented quite often.
Like a traditional POD site, Turning Art allows you to create an account and upload your works, they handle the business of printing and shipping, you just collect commissions.
Being that they are rentals, you aren’t going to make nearly as much in commissions, but unlike a traditional POD site where you only get one commission on a sale, on Turning Art, a particular piece will earn you a commission month after month as it is being rented. This is known as recurring revenue.
Finding buyers for your art may be difficult, but finding who want to just view it online is WAY easier. So, if you make art that draws people in, create a blog or website to feature your art. Then you can put some form of advertising on it to earn some extra money.
In the online world you have many options for advertising. Two of the most common are affiliate marking, and pay-per-click ads:
With affiliate marketing, you sign up to be an affiliate of a company. You put their advertisements on you blog or website. When visitors click on the ads and buy something from that company, you get a commission. Many companies offer the chance for you to become an affiliate directly (usually there is a link at the bottom of their homepage). Others use affiliate marketing brokers like ShareASale or Commission Junction.
With pay-per-click ads, you place ads on your site that earn you money (usually only pennies) when ever a visitor clicks on the ad. Whether or not they buy something from the company being advertised is irrelevant. The king of the pay-per-click ad systems is Google’s Adsense. If you do this, resist the temptation to click on the ads on your own site – it could get you banned by the provider.
Do Commissions
Perhaps people are not buying your art, but they like your style enough to commission work from you. Quite often I get requests for fantasy book covers as well as paleontology publications. It can happen. It is up to you though to handle a lot of the details though. You’ll have to write up the contract and deal with collecting payment as well as making any changes your client requests and dealing with how you will deliver the final work to them.
“A Minstrel Named Rynstrel”, A commission I did for a book cover
The key to making this work is to get your art found. It really requires similar skills as selling your art, but there are a couple of sites that cater more to this form of business. One that I use is DeviantArt, particularly when it comes to genres (suspense, mystery, fantasy, scifi, etc.), a lot of people look for illustrators here. Another site that works well (more for photos) is flickr.
One warning about commissions though: they can be very stressful. Realizing your own visions in art can be hard enough, but realizing someone else’s can really give you sleepless nights and grey hair. Communication with your client is essential.
License your art
This is a bit like doing commissions, except a lot less stressful. The way licensing works is that someone finds your art and wants to use it in their commercial endeavor, e.g. as the cover art for the book, for a graphic on their website, etc. You then make an agreement with them to use your work. As with doing commissions, you may need to deal with the contract and handling payment and such.
You don’t necessarily need to handle all the details with licensing though. For instance, I use and online service that handles some of the details for me: Pixels.com. It’s an extension of the POD site FineArtAmerica.com and allows people to license your work by purchasing a license then downloading a high resolution version of your image.
______________________
So, there’s a few alternative ways to make money with art online. There are likely many more. If you spend some time on artist forums, you inevitably pick up a few. Just keep an open mind and you’ll be surprised by the kinds of things that turn up.
Daniel
P.S.
Don’t forget to check out this week’s sponsor, Dick Blick Art Materials (since I offer this site for free, I have to fund it somehow 😉 )
Social Network sites are one of the keys to being successful artist online. They give you the ability to directly communicate with others, not just potential customers but other artists from whom you can learn.
I’ve said it before, the key to selling your art online is marketing. You should be spending half your “Art” time (or more) getting your art in front of people. In the online world, one of the key ingredients to your marketing recipe is the Social Network.
I’m sure you’re familiar with at least a few of them, but there are MANY of them out there. For this article, I’m not going to talk about a particular social network. Some social network sites are well known: Facebook, Twitter, Google+, etc.. However, what you may not know is that there are many web sites that you never thought about that are, in fact, social network sites. You see, the online social network is what in the software engineering business we call an architecture, and it’s a common one that websites are built upon. Pretty much any site where you have an account that you log into and where you can communicate with other account holders is built on the social network architecture.
For example, many of the POD sites, let you follow other artists, get a notification when they post new works, message them, and comment on or “favorite” their works. This is exactly the same as you “Friending” people in Facebook, seeing their updates in your feed, texting them in Facebook messenger, and being able to comment or like your friends posts. You’ll find this architecture everywhere, and there are some informal rules and tips you should know about this architecture for using it to your advantage to market your art.
Friending, Following, Subscribing to, etc
Key to the social network architecture is the ability to somehow associate yourself with other users. Just about every network seems to have a different name for it, but the effect is pretty much the same: you get to follow that other user’s activity on the site, and possibly they get to follow yours.
Sometimes it is a two way connection where you request the association from another user and they must accept it. The best example of this is “Friending” in Facebook. Once this associate is made, you are able to see each others activity on the social network.
More commonly however, the connection is only one way. You select another user on the network to follow. You will receive updates of the other user’s activity, but they will not see yours. However, they will probably be notified that you are following them. The best example of this is following someone on Twitter.
When it comes to marketing your art, you want as many such associations as you get. These are your audience, the people you are marketing to.
Also, in the case of the one way connection, it is considered good etiquette when someone follows you, to follow them back (effectively making it a two way connection). This is known as reciprocity. In fact, you should keep this in mind to gain followers of your own. Seek out people who you think will like your art on the network and follow them. Often, they will follow your back.
Liking, Favoriting, Recommending, etc.
Another major aspect to Social networks is the ability to somehow indicate that you like or support another user’s activity. Whenever someone posts some sort of entry, other users will have the option to express their support of that post by clicking on a link or icon, such as a “thumbs up”. Generally, when one of your posts receives such a commendation you are notified.
The effects of these can be varied from site to site. On some, they really don’t amount to much, but on others they may elevate the status of your post in some way, allow the “liker” quick access to return to your post, or even act as one of the one way connections mentioned in the above section.
As in the section above, reciprocity is good practice. If someone endorses one of your posts, you should endorse one of theirs, assuming they have some.
Private Messaging
Most social networks allow you to send messages directly to another user. These are like email in that only sender and recipient know the contents of the message.
Commenting
Most, but not all, social networks allow users to comment on one another’s activity. Reciprocity can apply here as well. If someone comments on one of your works, you might want to comment on one of theirs. At the very least, you should thank people for their comments. It’s good form and also gives you another opportunity to let them know that you exist.
One word of warning though about comments. Everybody viewing your posts, including your potential customers, will be able to see them. Immediately hide or delete any negative or critical comments (even if it is constructive criticism). You don’t want any potential customers to see anything that gives them doubts about buying your work. Also, it is bad form to make critical comments of others’ posts in such a public way. If you want to offer constructive criticism to another user, send them a private message.
Re-posting
Another great feature of social networks is the ability to re-post another user’s posts. If someone re-posts one of your works, their friends/followers will get to see it, and perhaps they to will re-post your work, and so on. If you are lucky, this will set up a chain reaction of re-posting that will get large numbers of people to see your initial post in what is known as “going viral”.
Just as in following, commenting, and liking, here reciprocity is good etiquette. If someone re-posts one of yours, you re-post one of theirs.
Groups
One more major aspect of social networks you should be aware of is Groups. These are where multiple users on the network can join a forum that caters to a particular subject. These can be a marketing gold mine if you produce works that fall under the theme of the group. Members of the group are expecting and looking for just your kind of art, so join the group and tell them about your work. However, be an active member of the group, comment on others posts to the forum and participate in the discussions. If you just post your art, and don’t do anything else, you will likely get banned from the group for spamming.
So it was a bit of a long article, but this is really stuff you need to know about Social Networks if you plan to use them in your marketing – AND YOU SHOULD. In future posts, I’ll be going over actual examples, but I’ll refer back to this one as the foundation for it all.
Regards,
Daniel
P.S.
Don’t forget to check out this week’s sponsor, BorrowLenses.com (since I offer this site for free, I have to fund it somehow 😉 )